Pages

Tuesday, October 29, 2013

Coupon/Review for Children's Mucinex® Multi-Symptom Cold


It's cold and flu season, use this $2 coupon to pick up Children's Mucinex® Multi-Symptom Cold.

My Oldest was up all night coughing and before I could get to the store the next day, my free sample of Mucinex arrived in the mail. She drank some and right away I noticed less congestion, sneezing and coughing. She finally slept well and so did I.

I like to keep this on hand since it's always 3 in the morning when I wish I had it. It's early this year and I was caught off guard. Praise God that I got it anyway!

Monday, October 28, 2013

X Marks the Spot!

 
My girls were invited to a hearties' pirate themed birthday party. The lad was turning 5 and I wasn't really all that sure to what to get a boy. Last year, I made a super hero cape that was a hit. We do give store bought gifts, but I like to try and think outside the box. With a theme like Pirates I could have gone in a dozen directions. After discovering our sea legs, we went with buried treasure.

For the coffer we filled a tin with gold doubloons (gold nugget candy and "gold" US dollar coins). We marked the tin with a giant X figuring he is only 5 and would need a wee bit of help.


We didn't want the booty to be found by a dirty scallywag. So public parks and such were out. Luckily I found a brethren of the coast willing to let some buccaneers avoid any interlopers by using their private island.

We carefully drafted our map on some pilfered canvas using landmarks and buildings. Then aged it with fire and soot for a more authentic look.


Our not so respectable cartography skills resulted in a land lubber rendition, that thankfully still steered the young buccaneer in the right direction.


The happy pirate crew! 
I'd love to hear about any inexpensive and creative gift ideas you have done!

Since your still here. Here is a link to a family favorite.


Thursday, October 24, 2013

Fiery Furnace

It all started this past January. Our energy bill showed that we consumed significantly more than other comparable houses. In the months since, we have continued to improve our energy efficiency. Our biggest project to date was finished just in time for the first snow of the season!
 
 
To keep a handle on the cost, My Vet did as much of the work as possible. Starting with hauling it into the basement. This wasn't going to be a one day project like the time we had one replaced in a previous house. So we waited until September when we could stay comfortable for a few weeks with out AC or Heat.
 
 
Look at this old guy. He was so old he didn't even have a rating. The furnace guy who is a friend of My Vet guessed it was in the low 70's. During demo, My Vet found lots of corrosion that was making the airflow even worse if you can believe it!

 
It's hard to see in this side by side, but the sticker on the new one says its rated at 96.1. It's also a chic charcoal color instead of the old army green, not that color matters in the dead of winter. It's just nice to know that the basement is going to be even cuter!

 
This photo of the exhaust pipe shows just how desperately we needed replacement. I'm also glad we installed that CO2 alarm so many years ago. We could have been in trouble!

 
During the long installation period, we lost functional use of the kids new play area. But as you can see in this photo I got the opportunity to paint the floor under the new furnace. I know that no one else can see it, but I'll know. I also washed out the base of the air return duct work my allergies are going to be so happy!!!
 
My Vet got back to work, you can see the AC manifold reinstalled. Although, I appreciate all the effort and really like the heat, I think the best part of this photo is all of the light in the background streaming in from the window!


The final push to get it working before the snow flies.


Just in the nick of time!
 
 
Neither of us can believe how fast it works to warm up the house! I'll let you know what it does to the energy bill ASAP

Monday, October 21, 2013

¡VĂ¡monos!

It's almost Halloween. I like start early so I have time to pull it off on a budget. My youngest found a costume at a thrift store for $3 and I had all the other parts hiding throughout the house. My oldest was another matter. We looked at every thrift store in town to no avail. Even though we live in a small town we have a whopping 5 of them. (7 if you count the furniture only ones)

Not finding anything she liked. She threw out random objects that she could go as. She then moved on to a variety of cartoon characters finally landing on Handy Manny. Since I love building stuff I should not have been surprised, but I was. Little sis briefly then wanted to be Kelly the owner of the Hardware Store. After reminding her that she already had a completed costume she settled with a "you can do that next year."

I forced myself to sit through an episode while snuggling with my kid on the couch. That is my kind of research. With the theme settled I jumped on the computer to forage for ideas, and a quick look through craigslist proved I wasn't going to luck out with a pre-made costume for cheap. Bummer.

On Saturday morning we got up early to do some couponing and for a quick look for items at the thrift store. Score! We found a green t-shirt (Long sleeve, unlike Manny we live Up Nort' and it gets cold on Halloween!) and a pare of perfectly fitting kids work boots for a grand total of $4.

The big pieces settled, I got to work on the details. I decided to take inspiration from the pre-made costumes I found online that incorporated the tool belt into the shirt. I had thought about just using real tools and tool belt, but worried that they would be considered weapons at school. We didn't have any toy tools since my girls have graduated to the real thing, and got rid of the toys during our garage sale.

 
I found images of Pat, Rusty, Dusty, Stretch, Felipe, Turner, Squeeze, and Flicker that I was able to print onto iron transfer paper. I used paper designed for dark colored shirts so that my tools would be vibrant. Since the paper is $3 a sheet I was careful to place all of the tools into one document to print. I did the best I could using paint. Those of you who are graphic designers probably could have done better, but I was happy with the result.

I carefully cut out each object any white border around an image would be visible. So I took extra care and diverted the 4 year old who really wanted to help with this step.

I arranged the pieces on the shirt and ironed them on by following the directions on the package.


The youngest found a trucker style hat in dad's cap bin. We just covered the logo and we are good! Then was time for the big reveal to the oldest. She was bummed. For starters she was hoping for a real toolbelt, but the biggest problem was that Manny's hat isn't blue. She thought it was orange or red, so I sent her to look through dad's cap bin for a suitable replacement.

Thursday, October 17, 2013

She's Getting Crafty Again..

When I originally painted the basement, I had lots of great plans for many of the areas, but I didn't really think about my craft area. Now that everything is so fresh and bright and the kids are spending so much time in their play area, I decided I should spruce up my play area too.

Here's how it looked last summer after a reorganization attempt.


Here it is again right after partially receiving a fresh coat of paint.


I started by doing a little more painting. This window was open during my painting marathon, so I came back to this small area with a brush. While I was at it I took a page from the other areas and painted an accent color behind the shelves. I used left over Greek Column for a subtle grey color. Sorry it's so washed out the fresh white paint on the window made a big difference. You can still see the slight grey color difference though.


Then I once again used scrap from the basement rafters for yet another project. I cut this funky design in a block of wood.
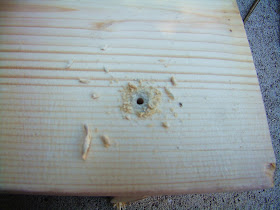
 
 
I drilled holes and then used a scroll saw to cut it out. I glued and wedged it into a space in the craft bench. Assembled scrap curtain rod pieces for a makeshift wrapping paper station.
 
Here it is in all it's glory, just in time for Christmas.
 
 
The grey color is much more pronounced in this image than it is in real life.


Monday, October 14, 2013

I did it, I did it, I did it Yeah!

Now that this project is finally finished, I can finally relax. I hope that I can also get Dora the Explorers voice out of my head too.
 

My Vet and his dad installed the mantle on the fireplace. I have been sharing so much in this process. But, I was too busy in the kitchen to remember to take any photos. 
 
Me like cookies! Cooooookies!
 
 
Here it is after I was able to eat some cookies and think clearly again. The piece of wood is just holding a piece of trim while the glue dries.


After Mom and Dad left for home, I got right to work finishing this project. I used a stain sealer in one that matches the rest of the woodwork in the house.


I remembered to sand between coats with this awesome sanding sponge thing that is easy on my hands


Since I let it dry over night between coats I stored the brush in this handy plastic bag in the fridge so that I didn't need to wash it between coats.

 
I used one of my kids brushes and a small dish of sealant to quickly seal the grout.
 
Now we are ready to build fires, which is handy since fall is here and the new furnace isn't exactly installed yet.


It's come a long way baby!


Friday, October 11, 2013

It's About the Grind; No Twerking Here

Sorry about the Twerking reference. I still find it hard to believe it's a thing, Yes I am getting old! I hope that since you've made it this far, you'll stick around this is just the beginning of this project.

While prepping the basement for paint, I have been able to salvage many things from the rafters. Including enough curtain rods to cover all the windows!

 
As with most salvage projects, my found items didn't exactly fit right away. Some of the rods where too long, some came too far away from the window, and none of them had mounting hardware.

I was fortunate to find one that fit perfectly to use as a template for the others. I measured and marked the pieces for cutting. I then stepped outside and used a grinder to cut down the halves.
My Vet helped with the first one, and I did the others.

I picked up new mounting hardware for less than a $1 a pair, and pre-drilled and screwed them into my freshly painted windows.

I have yet to find fabric I like at a price I like. (I may have just found some inspiration though for a DIY solution) For now the rods are hung and waiting. I was also able to use the scrap pieces from this project for yet another one!

The plane white curtain rod, installed and waiting for curtains.

Thursday, October 3, 2013

Safety Goggles as Art?


Well used collection of protective eyewear.
 
I have a bit of a safety goggle obsession. It started back when I was a newly wed. My Vet was still a student and we didn't have luxuries like cable, satellite, or Netflix. On Saturday mornings we could choose between infomercials, cartoons, or PBS. This Old House, About your House, Hometime, and the New Yankee Workshop quickly became our weekly Must See TV and my favorite quote was memorized.

"Before we use any power tools, let's take a moment to talk about shop safety. Be sure to read, understand, and follow all the safety rules that come with your power tools. Knowing how to use your power tools properly will greatly reduce the risk of personal injury. And remember this: there is no more important safety rule than to wear these — safety glasses." - Norm Abram

Yep that's were it began. (Sorry to my industrial arts teachers. I loved your classes and remember needing to wear goggles, but Norm made them cool.) Fast forward a *cough* few *cough* years and some free after rebate deals at Menards, I have "purchased", and worn, and misplaced lots of pairs, but no more! I have found a new and improved way to store them so they will always be at my fingertips.

I found some inspiration and decided I didn't want/need to spend $25 plus shipping. Instead I used all scrap/leftover materials for a total cost of $0. Whoot, Whoot!

Here is what I did.

Found some scrap lumber that I thought was long enough.
 
Measured the depth/width of my glasses to determine shelf depth and height. For me the magic number was 2 7/8".
 
Since I chose and inexpensive pine. I predrilled so that I wouldn't split the wood.
 
Using 3 1/8" deck screws I attached the shelf to the backer board. This was probably a bit of over kill, but I had them on hand and knew they would be sturdy enough.
 
My inspiration piece had fancy routered edges, since I don't have a router, I rounded my edges with a sander.
 
Here is the finished project right before I sanded or cleaned my glasses.
 
All finished. I still need a 8x12 frame for my print, but it is coming together!