Pages

Friday, April 26, 2013

I got outside!!!

Are you planning on spending some time outside this weekend? What is on your To Do list?
 
I've been keeping busy in the basement, but that doesn't mean I'm neglecting the rest of the house. I've been thinking and planning on doing some modest improvements outside.
 
 
I finally got the chance to get a couple of them done.


Yep I added shutters. After months of looking and shopping I was able to pick them up at Lowes for $20 a pair! I looked on Craigslist, but the only ones I liked where still $30 a pair with no installation hardware. I almost spent $40 a pair for new, but decided to check out just one more store... Lowes who had them clearanced! I really am blessed to find great deals.
 
Installation was a snap.


If the house looks a little lighter in the second photo, it's because I washed the siding and chairs. It's amazing how much dirt can accumulate in 7 years. I guess I better put that on the annual 'to do' list.
 
 
Finally I cut down the tree. Last year I thought I was done removing trees from the yard. Yet the more I looked at this one the less I liked it. It was so close to the house that it was growing at an odd angle; it shaded the roof and prevented the sun reaching the roof at a point where two roof lines converged; finally, it had a partner on the other side of the porch and I prefer asymmetrical lines.
 
 
Wow there's a window there! I still have more to do, but hey there is still snow on the ground.

To do:
Remove and compost the bags of leaves
Install foundation insulation
Fix skirting below the deck
finish painting the trim
Paint the front door
Remove/Replace/Hide those porthole windows
Plant something in the flower urn.
 
I'd love to hear about your outside activities. :-)

A Person's a Person No Matter How Small

Oh the places you'll go
This past weekend we got together with my Sisters' families to celebrate 2 of our small persons. How do you make one cake that is right for a 1 year old boy and a 6 year old girl? Dr. Seuss of course!

I decorated cookies to represent various Seuss characters. That allowed for mistakes since I wasn't working directly on the cake. I was also able to transport the various elements out of state and assemble them easily at grandma's.
Close up of the Dr. Seuss themed Birthday cake

Today was good. Today was fun. Tomorrow is another one.

Wednesday, April 24, 2013

Free Kindle Downloads


I am choosing to believe that summer is on the way. Today I spend a couple of hours working outside so that when it warms up, I can enjoy reading on the porch. (That post is coming) Here are some free books you can download so that your Kindle is ready for summer too!


An Autumn Wind in Walnut Creek (Amish Romance, Inspired Novel) (Amish Orchards)

In the Company of Secrets (Postcards from Pullman Book #1)

Dying to Run

Living with Fred (The Fred Books)

Miracles: 32 True Stories

Live, Love, Laugh and Laundry?

Natural Green Home Cleaning For Beginners

You can download the free app to read these on any device, or Amazon has a selection of Kindles starting at $69

Please note: Amazon pricing, promotions, and availability are subject to change at any time without notice. Please confirm the price is $0.00 before completing your purchase

Tuesday, April 23, 2013

Brain Freeze

It is April 23rd and I have woken up to fresh snow on the ground again! This is one of the coldest springs since the late 1800's. That isn't going to stop be from being ready for summer though. One of my favorite summertime treats are Freeze Pops. They are just tubes of frozen Koolaid, how could you make them any better?

This will blow your mind. Instead of just placing the tubes in your freezer, Place them on the side!

What? Really? So Simple, why didn't I think of it sooner?

Tuesday, April 16, 2013

Going Grey, on My Birthday?!?!

DSC07610

Earlier this week I prepped the walls. After gorging myself on my birthday dinner and ice cream cake, I had to work off the calories. I got to finish my day painting. My Vet put the kids to bed, while I tuned the Kindle into Psych. You know that's right. Even though it's looking pretty plain right now, I am loving how much brighter it is.
 

Border Patrol

I picked up some free paint during Ace's giveaway a couple of weeks ago. Now it is time to continue my efforts in the bathroom.
 
When we moved in, the bathroom had a wall paper border with a matching hand painted sink. Although I appreciate the efforts of the home's previous owner. I prefer a less is more approach.
 
DSC07608
 
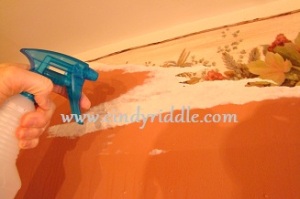
Having already removed wallpaper from other areas of the house, I knew just what I was doing. If wallpaper is hung over a well painted surface, removal is pretty straight forward, all you need is warm water in a spray bottle, a putty knife, a washcloth, and an empty garbage can. If tackling multiple layers you may want to rent a steamer or use one of these things to help you saturate the layers. If your wallpaper was hung directly over drywall, with no priming or painting, just sit down now and cry. That's what I've done. Fortunately, my walls were pre-painted. I started by peeling off the top layer. This layer usually has a plastic like coating that prevents the water from penetrating. Spray the white, back layer with warm water. I find cold doesn't work as well. I also try to work in 2 areas simultaneously. While the water soaks into one side I scrape the other, then spray and trade back to the already saturated side.
 
DSC07623
 
Find the 'grain' of the paper. I found if I peeled left to right I could easily remove large swaths of the top layer at a time. From right to left I was only able to pull a short 3-4 inch section.
 
DSC07620
 
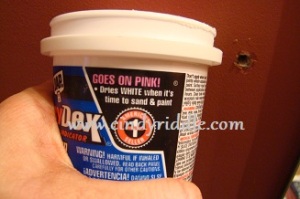
I also found that by spraying along the top of the border and letting it soak in from the top, I was able to remove an even larger area of the top layer. After using the putty knife to easily peel off the bottom paper layer, I just used a warm, wet washcloth to wipe away any residue. Being extra careful to remove any and all residue. I finished up my wall prep, by removing bathroom fixtures that I didn't like, and patching all the remaining holes. I like to use this girly stuff that goes on pink, and turns white when it is ready to sand.
 
 
DSC07614
 
It's white, time to sand.
 
 
DSC07631
 
The pink kind of spackle is paintable. Not all kinds of spackle are.
If you choose to use something different you must prime after sanding, before painting. Extra coats of paint will not make up for not priming. Yes I know this from previous DIY fails, thanks for asking.

Workin' the Wiggles Away

DSC07591

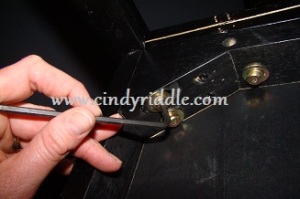
I am budgeting for a new couch, so I really don't want to spend any of that money on other pieces. Unfortunately, the rest of my furniture didn't see that memo. As I was moving chairs to vacuum, I notice a little too much wiggle. No! I grabbed a crescent wrench and a hex driver, and flipped the chairs over. Then I just tightened all of the screws and bolts. Snapped my fingers and was done.
 
DSC07589
 
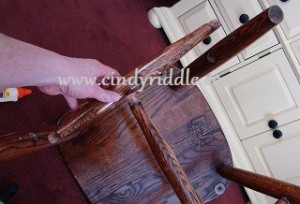
In triumph, I grabbed a celebratory glass of coffee and flung myself into a chair at the table, and it almost crumpled beneath me. I'm not exactly petite, but really? About 3 years ago I completely took this exact chair apart, re-glued all the joints and re-finished the wood. It seems like the spindle leg style never holds up and they are constantly in need of repair. Yippee!! I already know how to do it. I started with a rubber mallet to completely remove the loose spindle. A rubber mallet won't scar the wood like a regular hammer would.
 
DSC07594
 
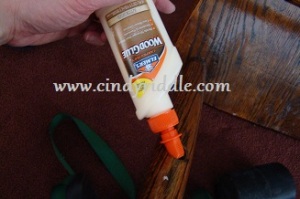
Generously apply glue.
 
DSC07595
 
Replace spindles into the holes. In addition to giving them a sharp tap with the rubber mallet, I also used some ratcheting straps to really torque those spindles into place.
 
DSC07599
 
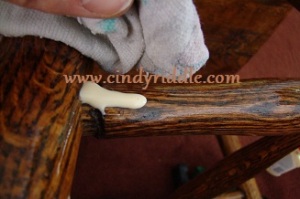
Removed any excess glue.
 
DSC07597
 
I then used some screws and tried to better secure the spindles to the seat.
 
DSC07600
 
After allowing the glue to set for 24 hours, the chair is back in use. For now catastrophe as been averted.

Thursday, April 11, 2013

Looking Up

 
There is nothing drastically wrong with the photo above. This is a basement ceiling in a circa 1930's house that will never have a "finished" basement. That isn't going to stop me though.
 
I intend on making this one of the nicest "unfinished" basements in town. (Well at least on my block) Since I am planning on painting the ceiling instead of hanging drywall, this could technically be left as is. That's not good enough for me though.
 

It was a pretty simple process to fix this, and the clips were reused in other areas where it would be harder to remedy. In those areas I used clips to secure wires without basement termination points and the ice maker and dishwasher water supply lines at every joist. (Yes, I could have diconnected the wires at the main box to feed through holes, but the box scares me.)

Ultimately my goal is for the ceiling to draw as little attention to itself as possible. Once I am finished with all of the streamlining of wires and pipes, my final step before paint will be to clean the joists of 80 years of cobwebs and dust. I'm hopefully only a couple of weeks away from that.

I've been reusing as much as possible. I am also going through the shelves again looking for items to sell on Craigslist to offset the costs. I am guessing I will be using a minimum of 20 gallons of paint to thoroughly cover the ceiling and walls. I'm lucky that I will be using a sprayer and not doing it by hand! I'm also clearing as much off the shelves as I can so, that when it comes time to paint I will have less to move and store elsewhere.

Wednesday, April 10, 2013

More Living Room Updates

DSC07552
 
I've slowly been improving this area of the home. Considering how much time we spend in this room, I should really be moving faster, but to be honest it takes me a really long time to figure out what I want and then to budget for it. My inspiration for this wall comes from this photo. And the building plans come from Ana White of course! Last Sunday My Vet and his dad knocked it together while mom and I ran to the store after church. (Yep, they are apparently that easy to make.)
 
It took me a day to putty the holes:
 
DSC07568
 
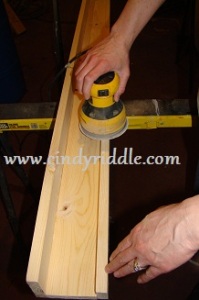
Sand with coarse and fine grit sandpaper:
 
DSC07565
 
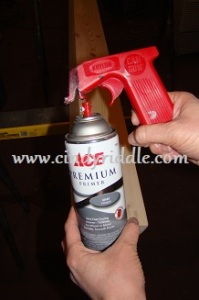
Grab this spray paint attachment I picked up years ago:
 
DSC07569
 
Prime and paint, repeat paint, again, and again: Gray primer since I wanted a black finish and hang, sorry no pictures of that, My Vet was at work and all of my hands were needed elsewhere. I have lots of tweaking left to do, but so far I like where it's headed.
 
DSC07573
 
Yes those are the images those frames came with. I told you I wasn't finished. To save you a trip back up to the top here is a side by side:
 
livingroom progress
 
I'll keep you posted as I continue to improve the wall.

Finding the end of the Rainbow

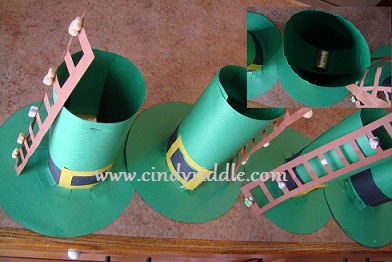
Happy St. Patrick's day. This year my girls and I intend to finally catch a Leprechaun! Armed with green construction paper, Lucky Charms, and some "gold" bars, we laid our traps.

St. Patricks Day
 
I know what I want to spend my portion of the Pot O' Gold on!   Darn he got away! But he left the girls a present on the window when he tried to run out!
 
DSC07587 DSC07588

B is For...

DSC07539

My girls already know their numbers and letters, but as a part of our weekly curriculum we still review letters. In addition to traditional methods of writing practice, reading books, and brainstorming words, it's good to have some fun.
 
Today I got to tap into my ballooning skills. A few years back I learned some balloon animal skills to help My Vet at a community block party. I have since been making them at various events, and the girls have shown an interest in learning so I like to pull them out once in a while. You can pick up the special long balloons and a hand pump at any party supply store. If you're going to start making them for larger groups, I would recommend you find a balloon supplier for larger quantities. A little how to:
Balloon Bracelet

Tuesday, April 9, 2013

I'm Talkin' to You!


Pile of ceiling debris
As you know I randomly post about whatever I am doing around the house. I tend to be very frugal, so I hope that my experience is teaching you inexpensive and easy ways for you to manage your home.

What I want to know is why do you keep coming back?

Don't get me wrong I will continue to randomly share my life with you, but I would hate to miss blogging something that you would be interested in.
For example. I have spend the last 2 weeks prepping my basement so that can I paint when the weather gets nice. Do you want the  intimate details on how I am prepping an 80 year old basement ceiling? Are you interested in how I am removing 100's of random nails apparently put in to hang stuff?

Could they have used the nails
to hang a puppet collection?

How about removing decommissioned duct work. (Oh wait you are going to hear about that one, I am planning on re purposing some of that.) What about my exhaustive study on the correct paint to use on ceilings, floors, shelves, and concrete walls? (Be careful what you ask for though, I have spent many hours in the basement over the past 2 weeks and am only about 1/4 of the way finished prepping.)


The 1/4 almost ready to paint
You can bet that I will post before/after photos so I can brag, but seriously what do you like to read? Do you want to learn how to freezer cook with recipes, save money with some deals, knock off a more expensive store bought item, or see basic DIY information? Do you just want to be entertained by my success and failures? Or are you hoping to win my next giveaway? Do you want to be challenged to try something new or possibly life changing?

I appreciate you taking the time to help me focus, and I really look forward to reading what you have to say.


Sunday, April 7, 2013

My Great-Grandma's Chocolate Cake


One Bowl Chocolate Cake
2 Cups White Sugar
3 Cups All- Purpose Flour
6 Tablespoons Cocoa Powder
1 teaspoon salt
2 teaspoons Baking Soda
1 Cup vegetable oil
2 Tablespoons Distilled White Vinegar
2 teaspoons vanilla extract
2 Cups cold water

Combine all ingredients in one bowl. No need to mix dry then wet ingredients like most other cake recipes. Prepare your cake pan with grease and flour so that it wont stick. Pour in batter and cook at 350 Fahrenheit for 35-40 minutes for a 9x13 pan. Insert a toothpick to check readiness. If it comes out clean it is finished baking. Cool and serve with frosting.

Creamy Chocolate Frosting

dsc07310 I am not a big fan of store bought chocolate frosting. I prefer the buttery, creaminess of homemade. With just a little bit of effort, and not much money you can achieve great results too! Milk Chocolate Frosting 3 Cups confectioner's sugar 2/3 Cup cocoa powder 1/2 Cup room temperature butter 1 teaspoon vanilla extract 5 to 6 tablespoons milk With a mixer blend 1 Cup of sugar the cocoa, butter, vanilla, and 2 Tablespoons of milk until creamy, gradually beat in the remaining sugar and milk until smooth.

Lookin' Good

DSC07527 It's March, it's a sunny, balmy 27F, it's Saturday and I'm ready for spring. One of my favorite sights of spring is the long line at the car wash. Provided it is when I'm driving by, NOT when it my destination. DSC07528 I loaded my pockets with quarters and headed to the car wash. Today was my lucky day. 2 cars + 2 trips + 0 lines = priceless Now If I don't go anywhere for the next month or so, they will stay sparkly clean. :-)