Pages

Tuesday, September 15, 2015

Curb Appeal


The hardest part about buying an older home is the constant need for repairs. Every year we tackle another big project, this year it is time for the siding.
Here is what we started with:

Front
South
Back
We've been saving up for this project. We knew that with all of the funky angles we didn't want to tackle this as a DIY. As with any home improvement project though there was a snowball effect. I was glad to have the energy to tackle those other things since Brad and his guys took over the rest.

Notice in the front we did a little redesign on the front. Opening up the porch brings more light in, I also really like the vertical lines over the port hole window. The other port hole window was changed to square and we finally can open it for some cross ventilation.


The snowball projects out front:
Update Light fixture
Paint porch trim
New house numbers
Match the window treatments in the left window to the right
Paint the blue foundation to match the red/brown upper siding
Trim the lower branches on the trees so you can see the improvement
Weed and mulch planting bed in front of fence
Plant shrubs by the house
You can see I've finished a few of them, I  still have a couple of those projects start.


In the back I had a few pop up too:
Update Light Fixture
Update the woodshed
Replace gutters
Paint blue foundation to match the red/brown upper siding
Trim the over grown hedges by the patio (Only half finished)

The wood shed was a lot of work, so here is a close up so you can admire my handy work.

Here is the before, see how much it needed to be finished:


I also picked up new matching lights for the garage, that I have yet to install.

Tuesday, September 8, 2015

Cracked Up!

This is a sponsored post written by me on behalf of O'Keefe Working Hands for Smiley360 . All opinions are 100% mine.

I bought my first container of O'Keefe Working Hands earlier this winter when I got my second fissure of the year in early November! I was desperate to not be in pain all winter. I'd seen it at the local hardware store, but thought it seemed like a lot of money for such a small can. Desperation has a way of changing perspective. The pain had subsided by the end of the first day, with in the week the fissure was well on its way to healing. Yeah!

Fast forward to the end of December and I am contacted by Smiley360 inquiring if I would like to recieve a free sample of O'Keefe Working Hands? Of course!  All I had to do was take some pictures and share my honest opinion. 

My problem came when they asked for before and after photos. Being an enthusiastic user of the product my before will be the same as the after. Then my friends came to the rescue. They wanted to know if it worked on feet. Lucky for me (?) My feet get fissures too, but I hadn't tried O'Keefe on them yet. I am not a foot person so fair warning, if you don't like get scroll no more! 


One week later. I still have a ways to go, but much better!


O'Keefe makes a foot cream too, but the ingredients list looks the same. Regardless this would be deemed an off label use.

***This summer I got a fissure when sandals dried my feet out. Overnight the pain was gone!

Friday, September 4, 2015

The Next Chapter.

Today marks the start of a new school year. This year that looks different for us. My Vet and I have always been proponents of homeschooling, now it's our turn to take the plunge.

Don't worry this blog is still going to focus on homemaking skills. Although,  I might toss in learning projects here and there. (All that work/creativity needs to be immortalized somewhere right?) The main focus will continue to be cultivating a home life you and your family love to live.

(Both are before this update)
Creating a separate space was important to me. I went pretty girly with their book nook, but this space would need to double as my office, and I need some serenity.

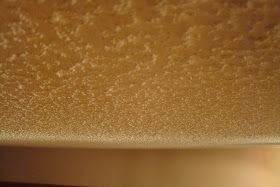
A simple modification to my office, turned complicated by a leak in the roof. The leak was repaired when we re-sided earlier this summer, that still left a hole in the ceiling and some patchwork to do.


Have you ever tried to patch a hole in a textured ceiling? Did you know how much I detest popcorn ceilings? Several weeks after removing the furniture, the ceiling was given a crisp, white, smooth finish; the walls were repainted in almost the original shade of soothing beige; layers of drywall dust were cleaned up and it was time to furnish.


Let's step back a minute. "Removing furniture" is a bit misleading. You see I actually spent 2 months purging, re-purging, and re-re-purging. Lots of completely full garbage cans, recycle cans, and many trips to the thrift store to free up some much needed space. I didn't want to ruin it all by buying loads of new stuff to refill it back up. 

This is the same view as above, minus loads of stuff! 
Yes there was a window there!


Here is the total of what I purchased:
Drywall mud (Everything else I needed to patch I already had!) $18
Paint (1 gallon for walls, already had primer, white and brushes/rollers)  $18
Table $25
Clock $5

$118 For a complete overhaul. Everything else I already had, or made from salvaged items around the house!

I really like how these art clips turned out. I made 1 for each kid.
(Yard stick, wooden clothes pins, paint, wood glue, staple gun, Command adhesive)


The left over canvases were a fun project for the girls.

The shelf was the first wood project I made after getting married. It's been in the garage storing assorted hardware for the past 10 years. After a good cleaning I moved it in and it fit the space and the bins perfectly.


I might still paint it in the future, but I just wanted to be done for now.


Tuesday, September 1, 2015

Mmmm Coffee....


***The product you see in the photo was given to me in exchange for my honest evaluation. All opinions expressed are my own.***


My kids eat hot dogs, and mac and cheese. I have an unhealthy addiction to baked goods. I like my steaks medium rare, I even shop the center isles of my grocery store. **gasp**

That said, I try to avoid many of the chemical additives such as aspertame, acrylamide, polysorbates, BHA and BHT. My general rule of thumb is to try and stick to foods my ancestors would be able to recognize as food. I say all that so you get a better understanding of me. What you eat and serve your family is none of my business. We all make choices that are best for us, that's the beauty of living in a country with so many choices and sources of information.

Why such a long-winded disclaimer?  Because my biggest obstacle in enjoying the Keurig is the plastic K-Cup Packs. For starters haven't we repeatedly been told that we shouldn't eat/drink foods that have been heated in plastic because of the toxins released? I honestly don't believe any company that tells me they've engineered a heat safe plastic. (Anyone ever played the card game BS?)


For years we've been told that us evil Americans are literally destroying the earth with our garbage. Here is a side by side photo of the old way and the Keurig way. (A 1 lb bag of coffee beans equals approximately 64 K-Cup Pack servings). That's 266% more garbage. I also can't help but wonder about the Fossil Fuels going into the K-cup Packs. It's interesting to note that there are "Green" companies that are part of this craze, yet very few actual stats are available to the consumer. (Remember that card game yet?)

Sorry about all the skepticism, I'm actually a glass is half full kind of person. I do question the rational that humans are capable of changing the global climate that has historically seen continental shifts, worldwide flooding, an ice age, and an E.L.E. that wiped out the dinosaurs etc. So my concern over garbage production and fossil fuel usage may seem out of place, but as a Proverbs 31 woman I try to be a good steward of resources.

As a good MN girl, I like love bleed Caribou Coffee so that's what I'm going to compare. I expect similar findings from the other brands of available coffees. 

Caribou Blend 12.99 1lb ($.20 per serving)
Caribou Blend 15.99 24 K-Cup Packs ($.67 per serving ) 2.67 packages of K-Cups = 1 bag of coffee. That's $42.53 vs. 12.99!

Now that I've gotten to geek out a bit, it's time to taste test!

I find the K-cup coffee to be much stronger than I can make with a traditional coffee maker, I put that in the plus column!

I also find it so easy to just make another cup, I have had to cut myself off at Noon so that I can sleep at night.

1 week into the test, I have put on weight from the constant availability of brewed beverages. Both my Vet and I have had heartburn problems that we have not previously had. We also feel like our heart rates have increased and feel jittery.

Final result: NOPE going back to my traditional coffee pot.