 |
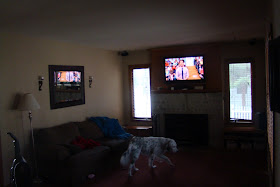
| Before Photo of my dark living room, even with the light streaming in the windows. |
 |
| All the tools I used. (I forgot to photograph the fish line) |
I started by measuring my room roughly 20x12. Then based on the manufacturers recommendation, and the spacing of my joists, I mapped out the placement of my 6 fixtures.
I measured and marked where they would go.
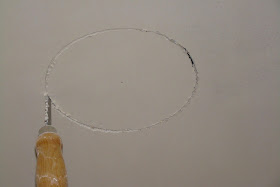
I scored the cutout with a utility knife
Then used a drywall saw to cut a precise hole. A specialty tool for working with drywall that is worth the $5. Be careful measure twice, cut once. Any mistakes will need to be patched/repaired it is easier to erase pencil marks than it is to patch a bunch of holes.
Fish the wire from hole to hole. Make sure you have a continuous line of wire to each can, (creating a complete circuit) before pushing the can into the ceiling and securing.
Connect the wires. I have this cool tool that cuts and strips the wire in one squeeze of the handle. (Sorry for the poor resolution. doing a tight shot in bad lighting...)
Push in can. Be sure to use proper cans for your installation. I needed remodel lights rated for direct contact with insulation (IC). Install housing/trim and bulb.
 |
| Ceiling, Walls, Lights, After |
**Before starting this project I did some looking online. Thanks to that looking I found a 6 pack of recessed ceiling housings at Lowes for $48 (Menards and Home Depot were over $100) While at the store to pick them up, I found a clearance deal for a 6 pack of trim for $12 (Originally $40) Since I live in a rural area, I didn't want to miss anything so I grabbed a 100' of wire and bulbs. My total for everything at Lowes was $110. By shopping (and getting a bit lucky) I was able to do this entire project for very little $$!


No comments:
Post a Comment
Want to make my day? Leave a comment. I read and appreciate EVERY one of them, REALLY, I DO!